Oragami Shuttle Box
The shuttle box is a traditional and simple Japanese origami model. It is similar to the traditional box. I personally prefer this box over the traditional one.

Step 1: Fold a blintz base

Step 2: Unfold the blintz base

Step 3: Valley fold point A (the top point) to point B

Step 4: Valley fold the top edge down


Step 5: Repeat steps 3 and 4 on the three remaining corners so your model resembles a frame

Step 6: Turn the model over and valley fold the left and right edges to the center


Step 7: Unfold the last two folds, then valley fold the top and bottom edges to the center

Step 8: Valley fold edge AB to edge CD. Make sure to only fold the top layer

Step 9: Now valley fold corner A and corner B in to points C and D


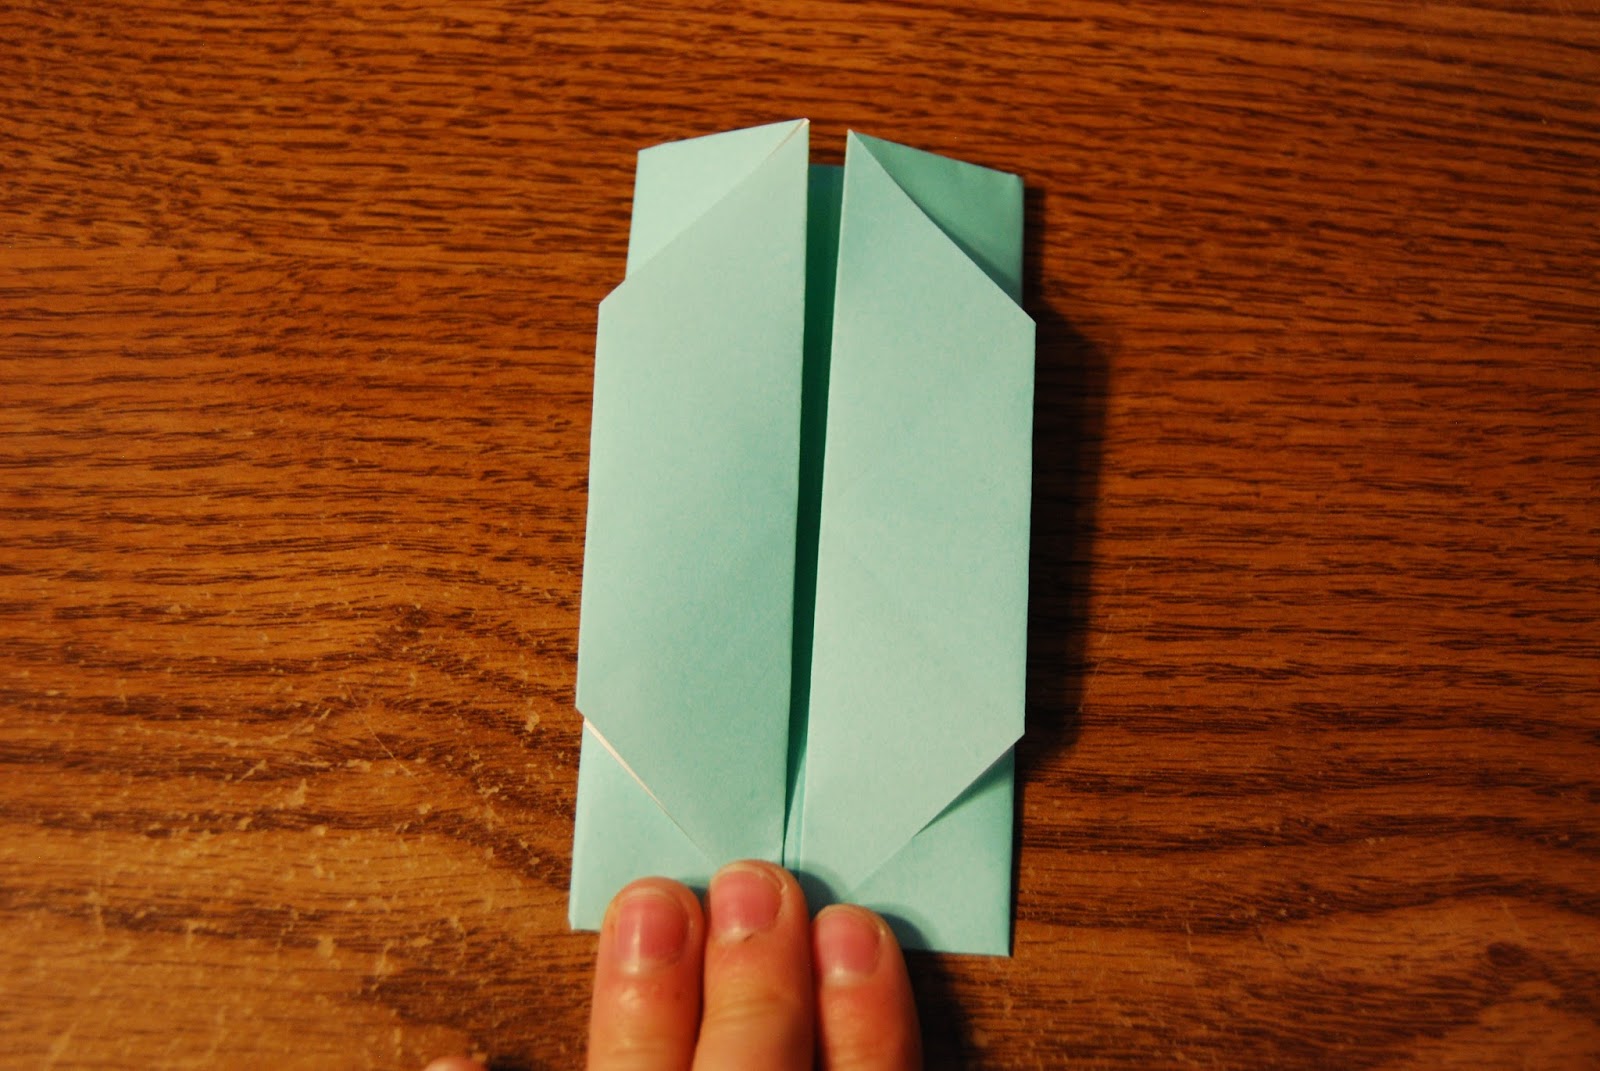
It should look like this:
Step 10: Now valley fold the top edge down

Step 11: Rotate the model 180 degrees

Step 12: From here repeat steps 8 through 10

Step 13: Now that your model looks like picture below, pry open the top layer to form the box


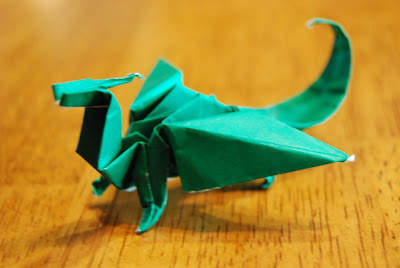
Ta-da!The finished shuttle box!

These boxes can be used as nesting boxes or as lids. The ones showcased below were made of paper that was different sizes. The larger one was made from a paper that was a centimeter longer and a centimeter wider.


Comments
Post a Comment