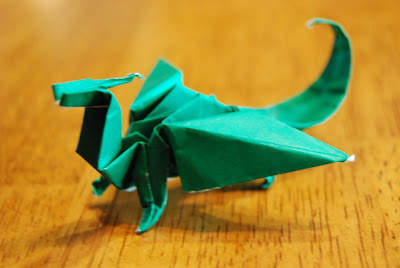
Folds
This is an index of all the folds that are used in this blog. Some of them are used only a few times, but others are used a lot.
Folding Tips:
Make sure that all of your folds line up as perfectly as possible to insure accuracy
Feel free to use a pencil or similar tool to make sure all of your folds are creased well
Crease folds as much as possible when doing complex folds (i.e. petal fold) as it makes the trickier steps easier
Look at the before and after pictures before you do a complex fold so you know what you're trying to do
Practice a new fold several times on a simple model before using it in a more complex one
Valley Fold:
To valley fold, take one part of the paper/model (the instructions will tell you where, in this case the left side) and just fold it over. This is the most common and basic fold.


Mountain Fold:
To mountain fold, take the part of the paper as instructed, and fold it around the back of the model. In this example, the top corner is folded around the other side. The mountain fold is the opposite of the valley fold, so if you have problems, you can just turn the paper over and valley fold.


Inside Reverse Fold:
The inside reverse fold is a fairly hard fold to do. To do it you first precrease, then open the flap you are folding, and push it up so it is on the inside. The pictures below skip the precreases, as I hope you know how to do that already.


Outside Reverse Fold:
The outside reverse fold is very similar to the inside reverse fold, but instead of folding the paper so its on the inside, it is folded so it is on the outside. To actually fold it, precrease, open the flap, and move the part you are folding up and over so it is on the outside.


Petal Fold:
The petal fold is not commonly used, but it is used to create a bird base, so you definitely should learn it. To fold it you need to first precrease as instructed, then take the top of the flap you are directed to and fold up. This will bring up the edges, which can be flattened to change the shape of the model.


Squash Fold:
The squash fold is a very useful fold, and it is obtained by opening a flap and squashing it flat. You first precrease (make sure that you are trying to squash fold a flap, not a single sheet). Open the flap up and align the crease in the middle of the top with the line at the bottom portion. To complete it, just squash it flat.


Rabbit Ear Fold:
The rabbit ear fold is a relatively easy and common fold that any origami artist should know. To fold it, precrease as instructed, then bring the two edges of the flaps together (in the example the top and bottom right flaps are used). Pinch at the bottom once they have come together. This will give you a little triangle (the rabbit's ear) which you can flatten and fold up or down.


Pleat Fold:
The pleat fold is a very easy fold that is mostly used to just add detail to a model. To pleat fold you just do a series of valley and mountain folds of the same length as demonstrated below.


Crimp Fold:
The crimp fold is yet another detail fold used to beautify a model. A crimp fold is very similar to a pleat fold. To crimp fold you open the part you want to crimp, then valley fold part of the paper over, then mountain fold it back, leaving some paper in between. You then close the part and you crimp is done.


Sink Fold:
To sink fold, first precrease. Then open the paper up and pinch the edges of the square to define them. This turns the valley folds into mountain folds, which in turn lets us sink fold. Them press the point in the middle, and the point has sunk into the model.


Comments
Post a Comment