The Star Box
The star box is a great traditional model and teaches a very important fold, the squash fold. The box is also practical and sturdy.


Step 1: Fold a square base and have the open end at the bottom

Step 2: Take bottom left edge and valley fold it so it aligns with the center
Step 3: Valley fold the right edge to the center as well

Step 4: Unfold both of those folds

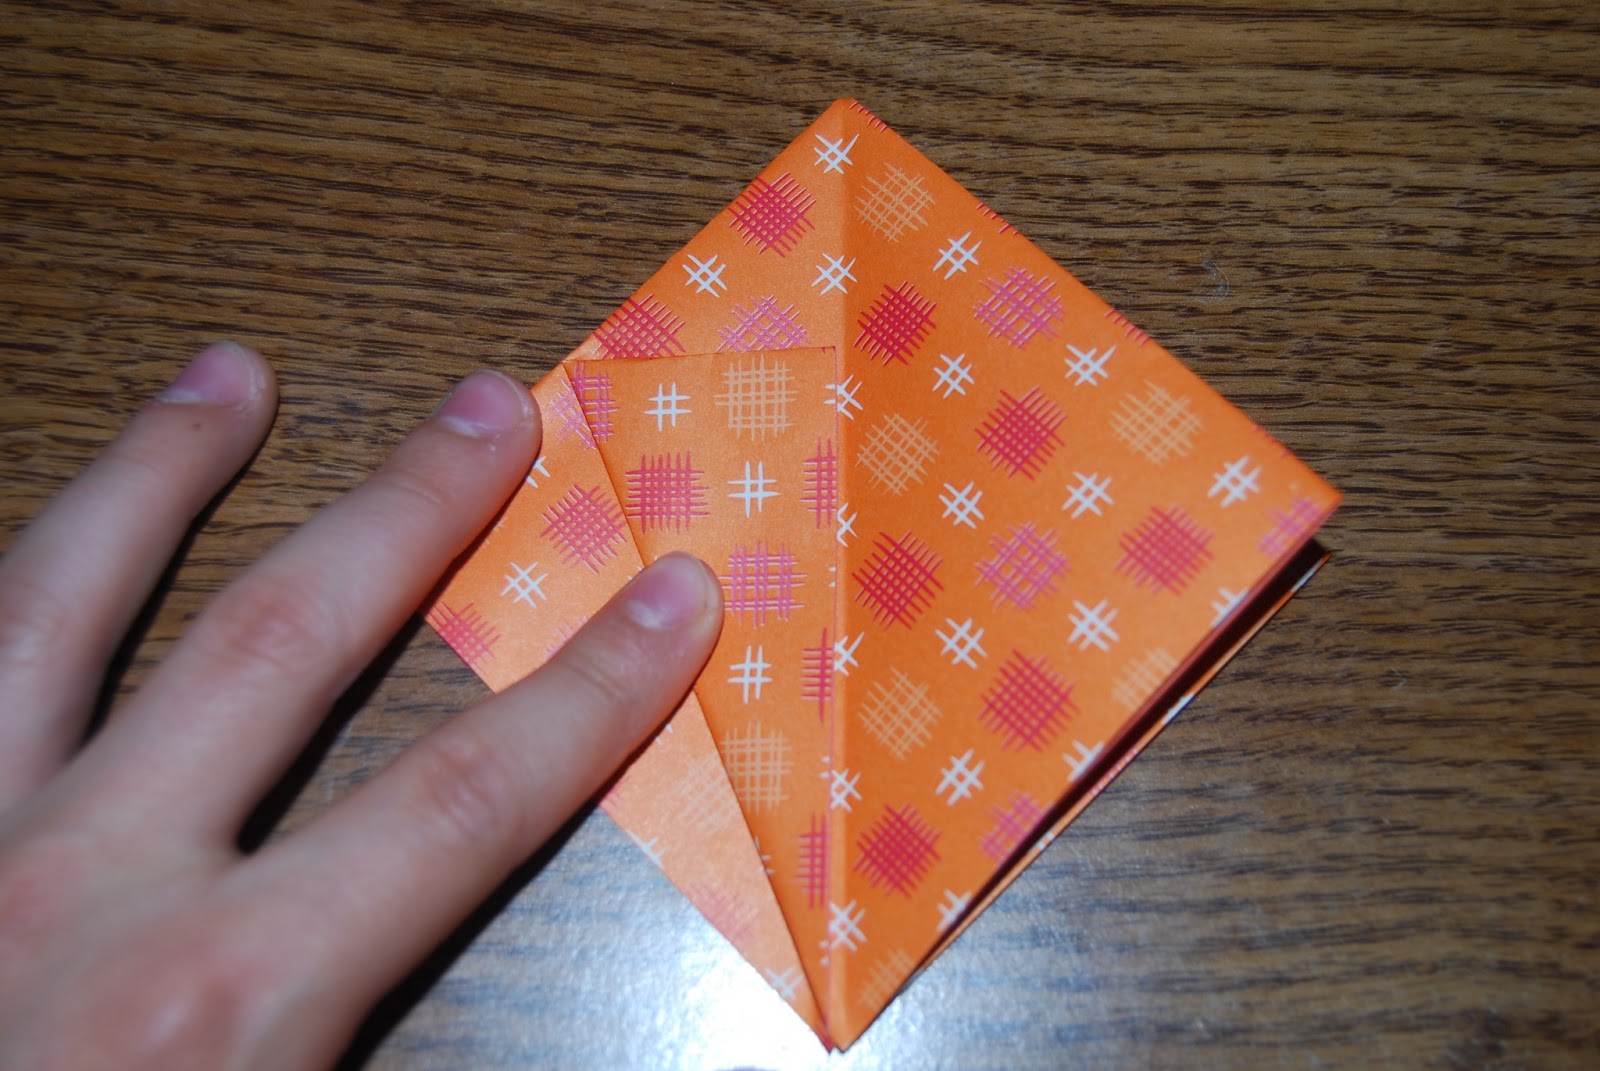
Step 5: Take the left edge and open up the little pocket inside and squash it down so the crease on the top aligns with the bottom crease. This is called a squash fold.


Step 6: Squash fold the right hand flap so it is identical to the left one

Step 7: Valley fold the bottom point up as far as it will go

Step 8: Turn over and repeat steps 2 through 7 on this side

It will look like this on both sides:

Step 9: Turn the model on its side, place your finger inside the gap and flatten it (make sure to do the same on the back side which you can't see in the pictures; it needs to be the same on both sides)


Step 10: Valley fold the bottom left edge to the center as shown below

Step 11: Valley fold the bottom right edge to the center

Step 12: Valley fold the point at the bottom up as far as it will go

Step 13: Turn over and repeat steps 10 through 12 on this side

It will look like this on both sides:

Step 14: Now its time to create the box. Place the model so the hole at the bottom is facing you.

Step 15: Take the two flaps and gently pull apart. Also take the right and left hand flaps that are folded to their respective sides and unfold them.

It will look about like this:

Step 16: Stick you fingers in the top of the box and flatten out the bottom and define the edges

Your star box is now completed! It works great for holding things, especially candy.


Comments
Post a Comment