Posts

Showing posts with the label Bases

The Helmet Base

Image
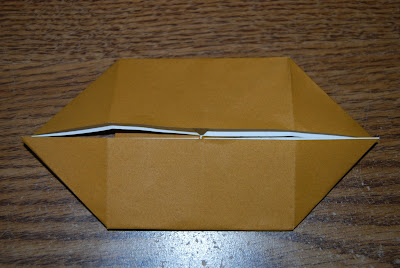
The helmet base is a very easy origami base that requires only a few steps to make it. It is most commonly used to make a Samurai hat  (or helmet). Step 1: Place your paper color side down and orient it diagonally Step 2: Valley fold the top corner to the bottom and crease Step 3: Valley fold the far left corner to the bottom point Step 4: Valley fold the far right corner to the same spot Your helmet base is now complete!  Model(s) requiring helmet base: Samurai Hat
The Boat Base

Image
The boat base is a less common, but still important, origami base. It is rather simple, and can be used to fold a variety of origami models. It is also used to help make the  pinwheel base . Step 1: Start with your piece of paper color side down Step 2: Crease the paper by valley folding the paper in half horizontally and vertically Step 3: Crease the diagonals  Step 4: Valley fold the right and left edges to the center Step 5: Valley fold the top and bottom edges to the center Step 6: Partially unfold the top flap Step 7: Valley fold the point at my index finger to the point at my thumb... ... like this: Step 8: Do the same on the other side and squash fold the flap flat  It should look like this: Step 9: Rotate the model 180 degrees Step 10: Repeat steps 6-9 on the new top part to complete your boat base! Models requiring Boat base: The Butterfly The Pinwheel Base No...

The Frog Base

Image
The frog base is a more complex base folded from the square base. It is mostly used to make frogs (hence the name), and to make it you need to have mastered the petal and squash fold. If you plan on making a frog from it, green is probably the best color. Step 1: Fold a square base  and have the open end at the bottom Step 2: Take the left hand flap and squash fold it down...  ...like this: Step 3: Do the same with the other three flaps so they all look like this: (tip: you will have to temporarily fold some flaps to the side to do this to all three flaps) Step 4: Valley fold the bottom left edge to the center (make sure to only fold the top layer) Step 5: Valley fold the top layer at the bottom right edge to the center Step 6: Unfold the folds you made in steps 4 and 5 Step 7: Take the green flap and petal fold it up (its best to grip where my thumb is in the pic)  It will look like this: ...

The Fish Base

Image
The fish base is a relatively easy base, and it also teaches the rabbit ear fold. The fish base is used (as the name suggests) to make fish (for the most part). Step 1: Orient your paper like below Step 2: Valley fold the left corner to the right  Step 3: Crease and unfold Step 4: Valley fold the top right edge to the center Step 5: Crease and unfold Step 6: Valley fold the bottom right edge to the center, but try to only crease the part that is in the bottom half of the paper.  Step 7: Unfold Step 8: Rabbit ear fold the paper by bringing the two edges together and pinching them at the base so it forms a triangular flap. Valley fold this flap up. Step 9: Repeat steps 4 through 8 on the left side to complete your fish base!

The Blintz Base

Image
The Blintz base is a very simple base to make and it is used in several models such as the traditional box and the fortune teller. Step 1: Start with your sheet of origami paper color side down and position it as shown below Step 2: Valley fold the left corner to the right corner Step 3: Crease and unfold Step 4: Valley fold the top corner down to the bottom Step 5: Crease and unfold Step 6: Valley fold the top corner to the center of the paper. The center will be at the intersection of the creases Step 7: Valley fold the other three corners in and your blintz base is complete!