Posts

Showing posts from April, 2013

The Waterbomb Base

Image
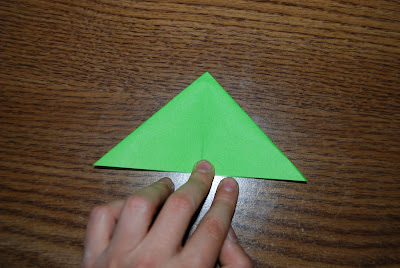
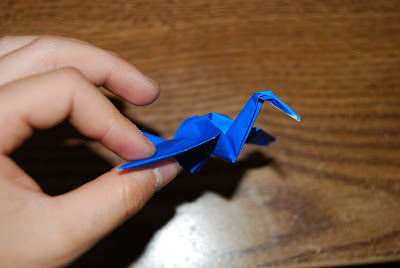
The waterbomb base is a base used to create many inflating origami models such as the waterbomb or the inflatable bunny. It is relatively easy, and is almost an inverted square base. Step 1: Start with a square sheet of origami paper color side up and valley fold in half along the vertical axis Step 2: Unfold and valley fold the paper across the horizontal axis  Step 3: Unfold and MOUNTAIN fold (opposite of the valley fold) the left corner around the back to touch the bottom left as shown below Step 4: Unfold and MOUNTAIN fold the top right corner down to the bottom left Step 5: Unfold Step 6: Take a finger and place it under the center point and push up. This pulls the edges together. This is almost exactly the same as with the square base. Step 7: Flatten and you have a completed waterbomb base! You now have what you need to make any models that require a waterbomb base to be folded first.

Origami Peace Crane

Image
The peace crane is a common and classic origami model. Legend says that if you fold 1,000 cranes you will have any wish granted. I haven't tried, but you're welcome to. Step 1: Fold a bird base  and have the two separate flaps point down Step 2: Take the left corner and valley fold it up so the edge meets the center of the model Step 3: Valley fold the right corner so the edge meets the center line Step 4: Turn over and repeat step 2 and 3 on the other side It should look like this: Step 5: Take the right hand point at the bottom and valley fold it up at an appropriate angle, crease, and unfold Step 6: Turn it over and valley fold the left hand flap (the same flap as before) at the same angle as in step 5 Step 7: Unfold Step 8: Now take the left flap that have had the pre-creases done on it and push it up, inside reverse folding it  to become the tail of the crane Step 9: Flatten

The Flapping Bird

Image
The flapping bird is relatively easy, and is one of the few origami models that are designed to move (in this case flap). The flapping bird also teaches the inside reverse fold, which can be tricky at first. Step 1: Fold a bird base  and have the two separate flaps at the bottom Step 2: Valley fold the right flap up at about the angle shown in the picture Step 3: Unfold and turn over Step 4: Now valley fold the left hand flap (which used to be the right hand flap) at the same angle as in step 2 Step 5: Unfold and rotate 90 degrees so it is on its side Step 6: Now bring the flap up and position it at the angle that the previous creases were at and flatten. This fold is called the inside reverse fold and may take a few attempts to get right. The inside reverse fold is used so the fold is not made to the right or left sides, but is made in the center and should be even. Step 7: Repeat steps 1 through 6 on the opposite